“RUTH” PATTERNS STARTED! CARTOONING TECHNIQUE
Here is an interesting little art history lesson on pattern making. It’s a technique that is truly time tested!
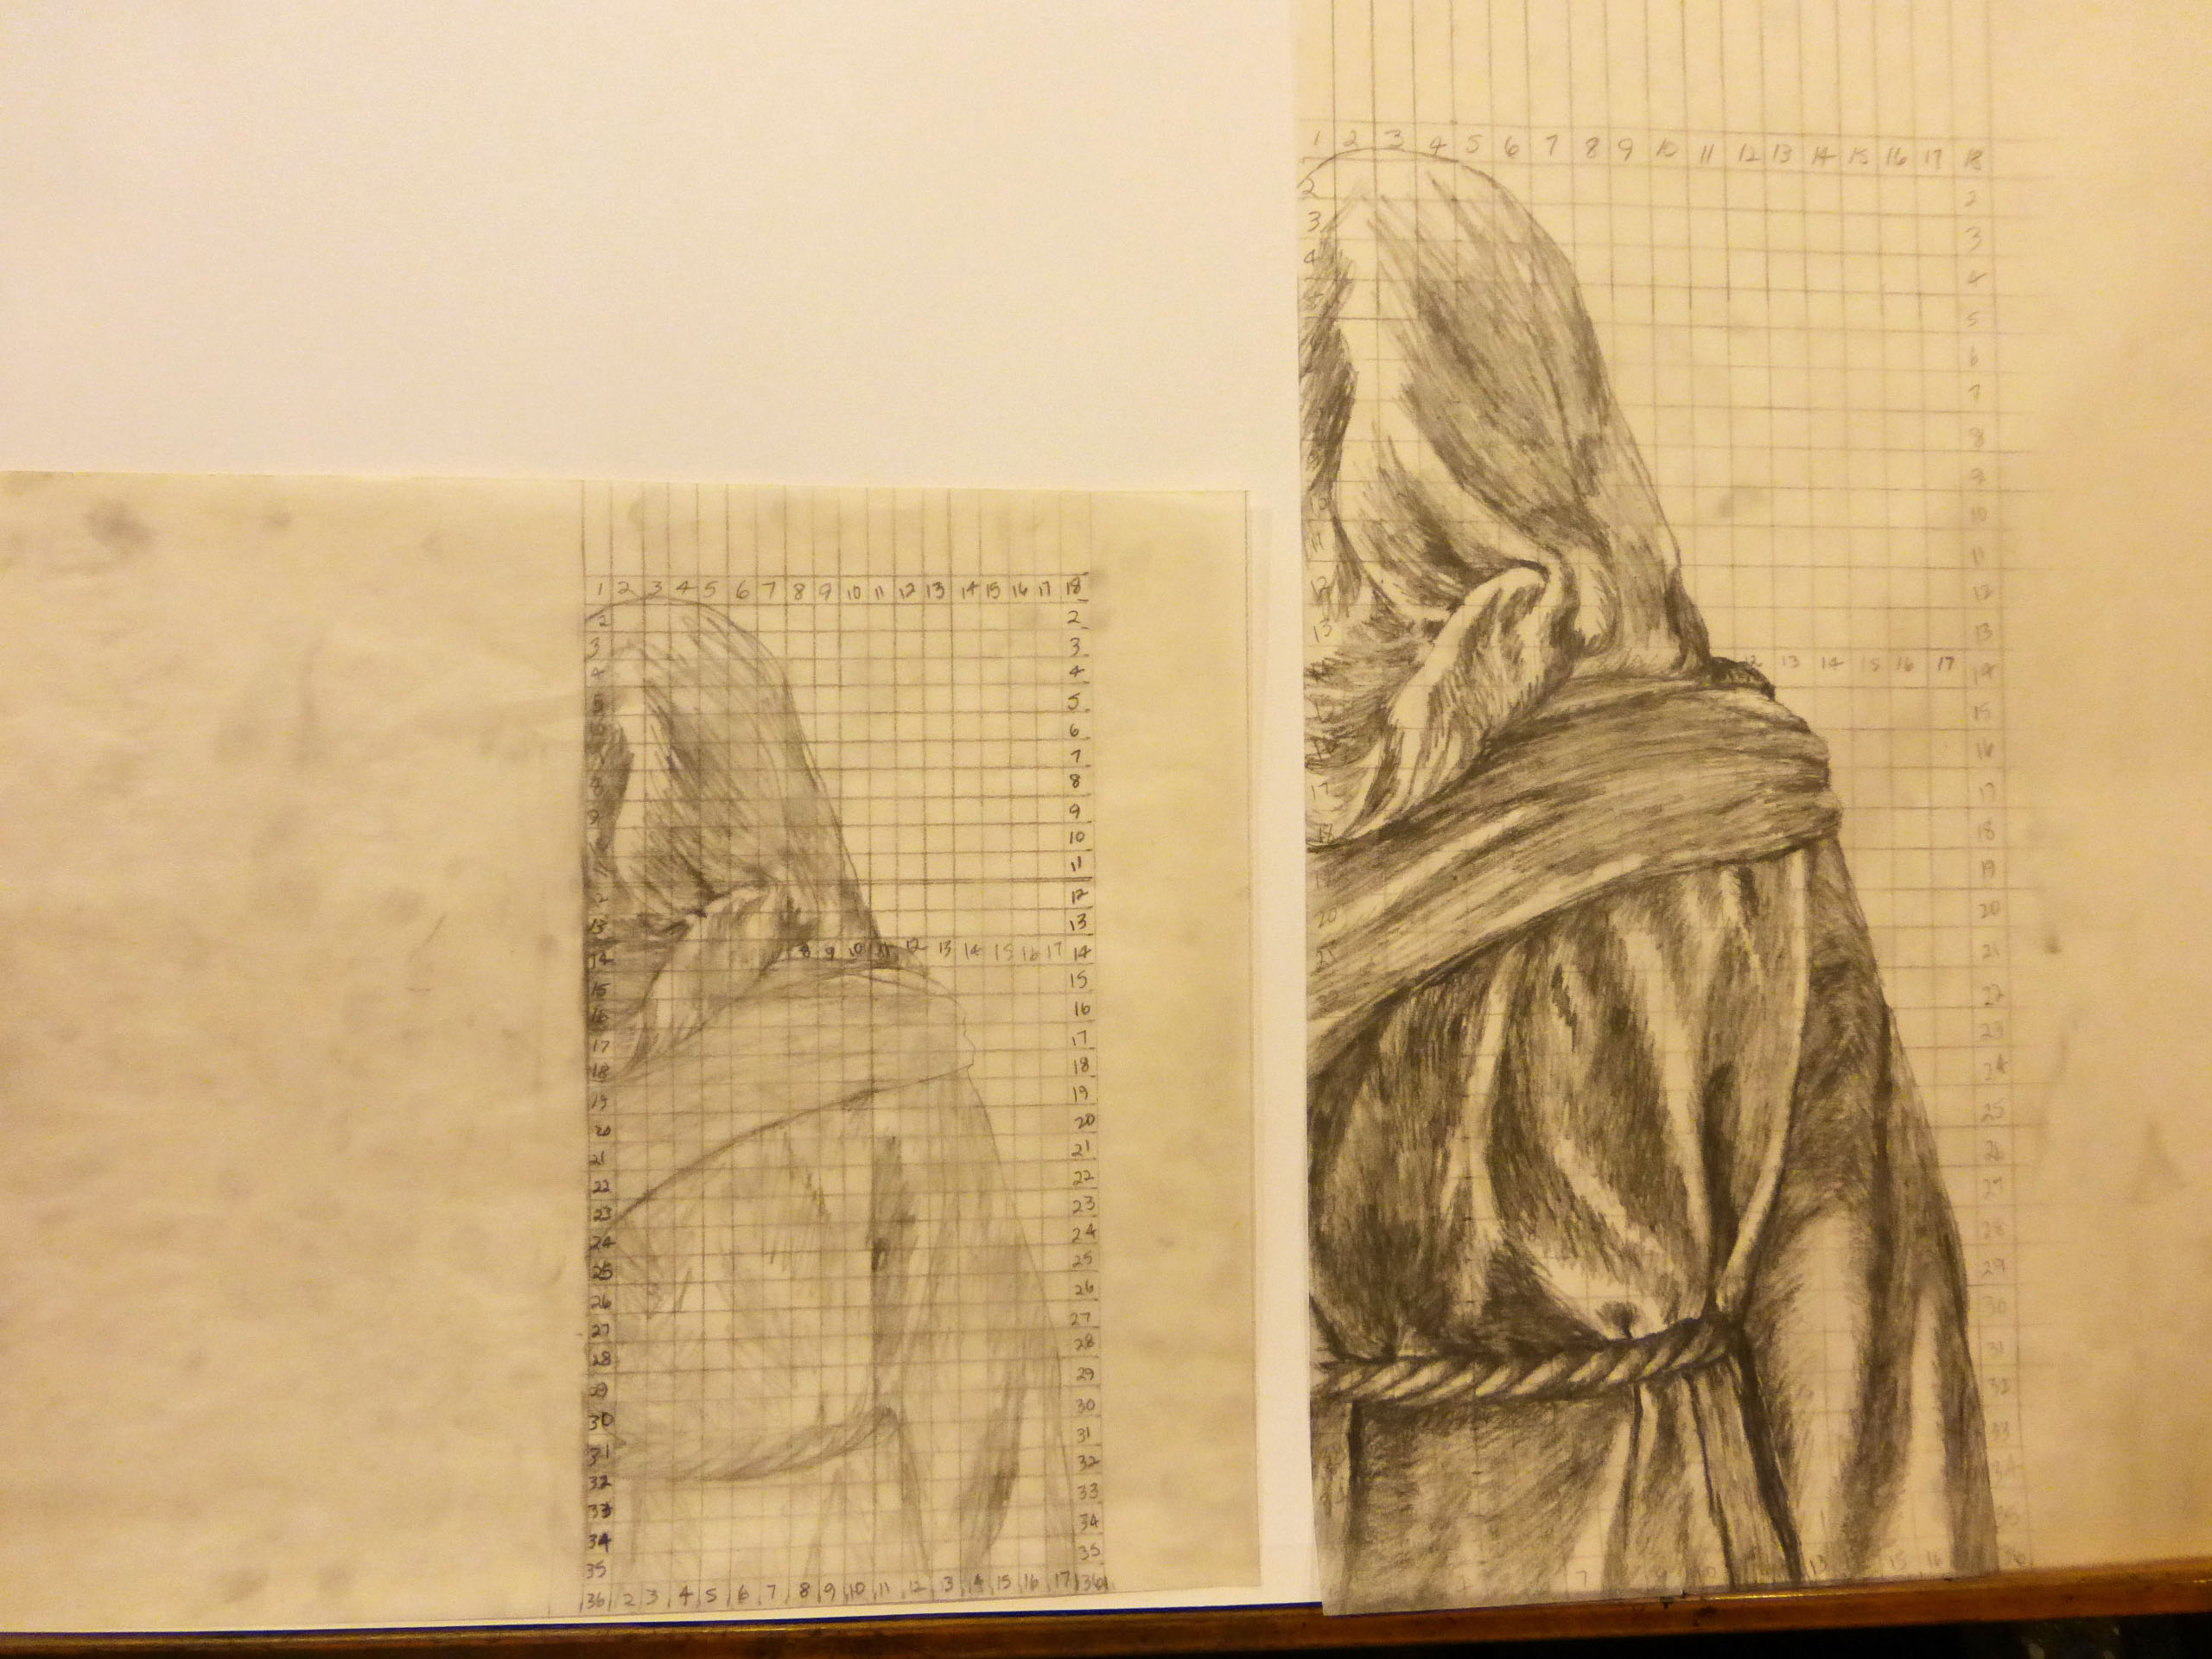
Tonight I started on the pattern(s) for “Ruth”. I use the plural because Naomi’s back, and the frontal view of Ruth will be in different sizes, and I have to make them separately in order to achieve the proper perspective in accordance with their proximity to each other. This requires two different grid sizes. OK, so here’s what happens in this process: I draw out my pattern, then mark it off in a grid, usually 1/4 inch. If I’m going to enlarge it, I draw out another grid, let’s say 5/8 inch. Then I number off both grids. I look at the lines in block 1 on the smaller grid pattern, then start drawing those lines in block 1 on the larger grid pattern, following the lines block by block until the pattern in completed. After the outlines are completed, I usually fill in the basic shading and correct as many mistakes as I can see on the completed larger pattern before transferring to the final art paper. The purpose of all this is to make my mistakes here, so they don’t get transferred to the art paper
.
This technique has worked for centuries. Michelangelo learned the process while he was an apprentice under Leonardo DaVinci. It was called “cartooning” back then, and was used for putting patterns on wet plaster for fresco painting. By the time Michelangelo was on his own and painting the Sistine Chapel ceiling, he had an army of apprentices working for him, too. He would draw out the patterns. His apprentices would grid them out according to the size of the area of the ceiling he was working on for a particular scene, and blow them up on a huge grid to fit that area. Then, they would punch tiny holes along the lines, much like a punch wheel is used today on pattern transfers in sewing (for you seamstresses out there, or sign painters who use a punch wheel for lettering patterns). After that, Michelangelo would apply wet plaster in whatever area he was frescoing, place the pattern over it, and dab the holes with a bag of powdered cobalt chalk. The chalk would sift through the cloth of the bag, through the holes in the pattern, and onto the wet plaster. When the pattern was removed,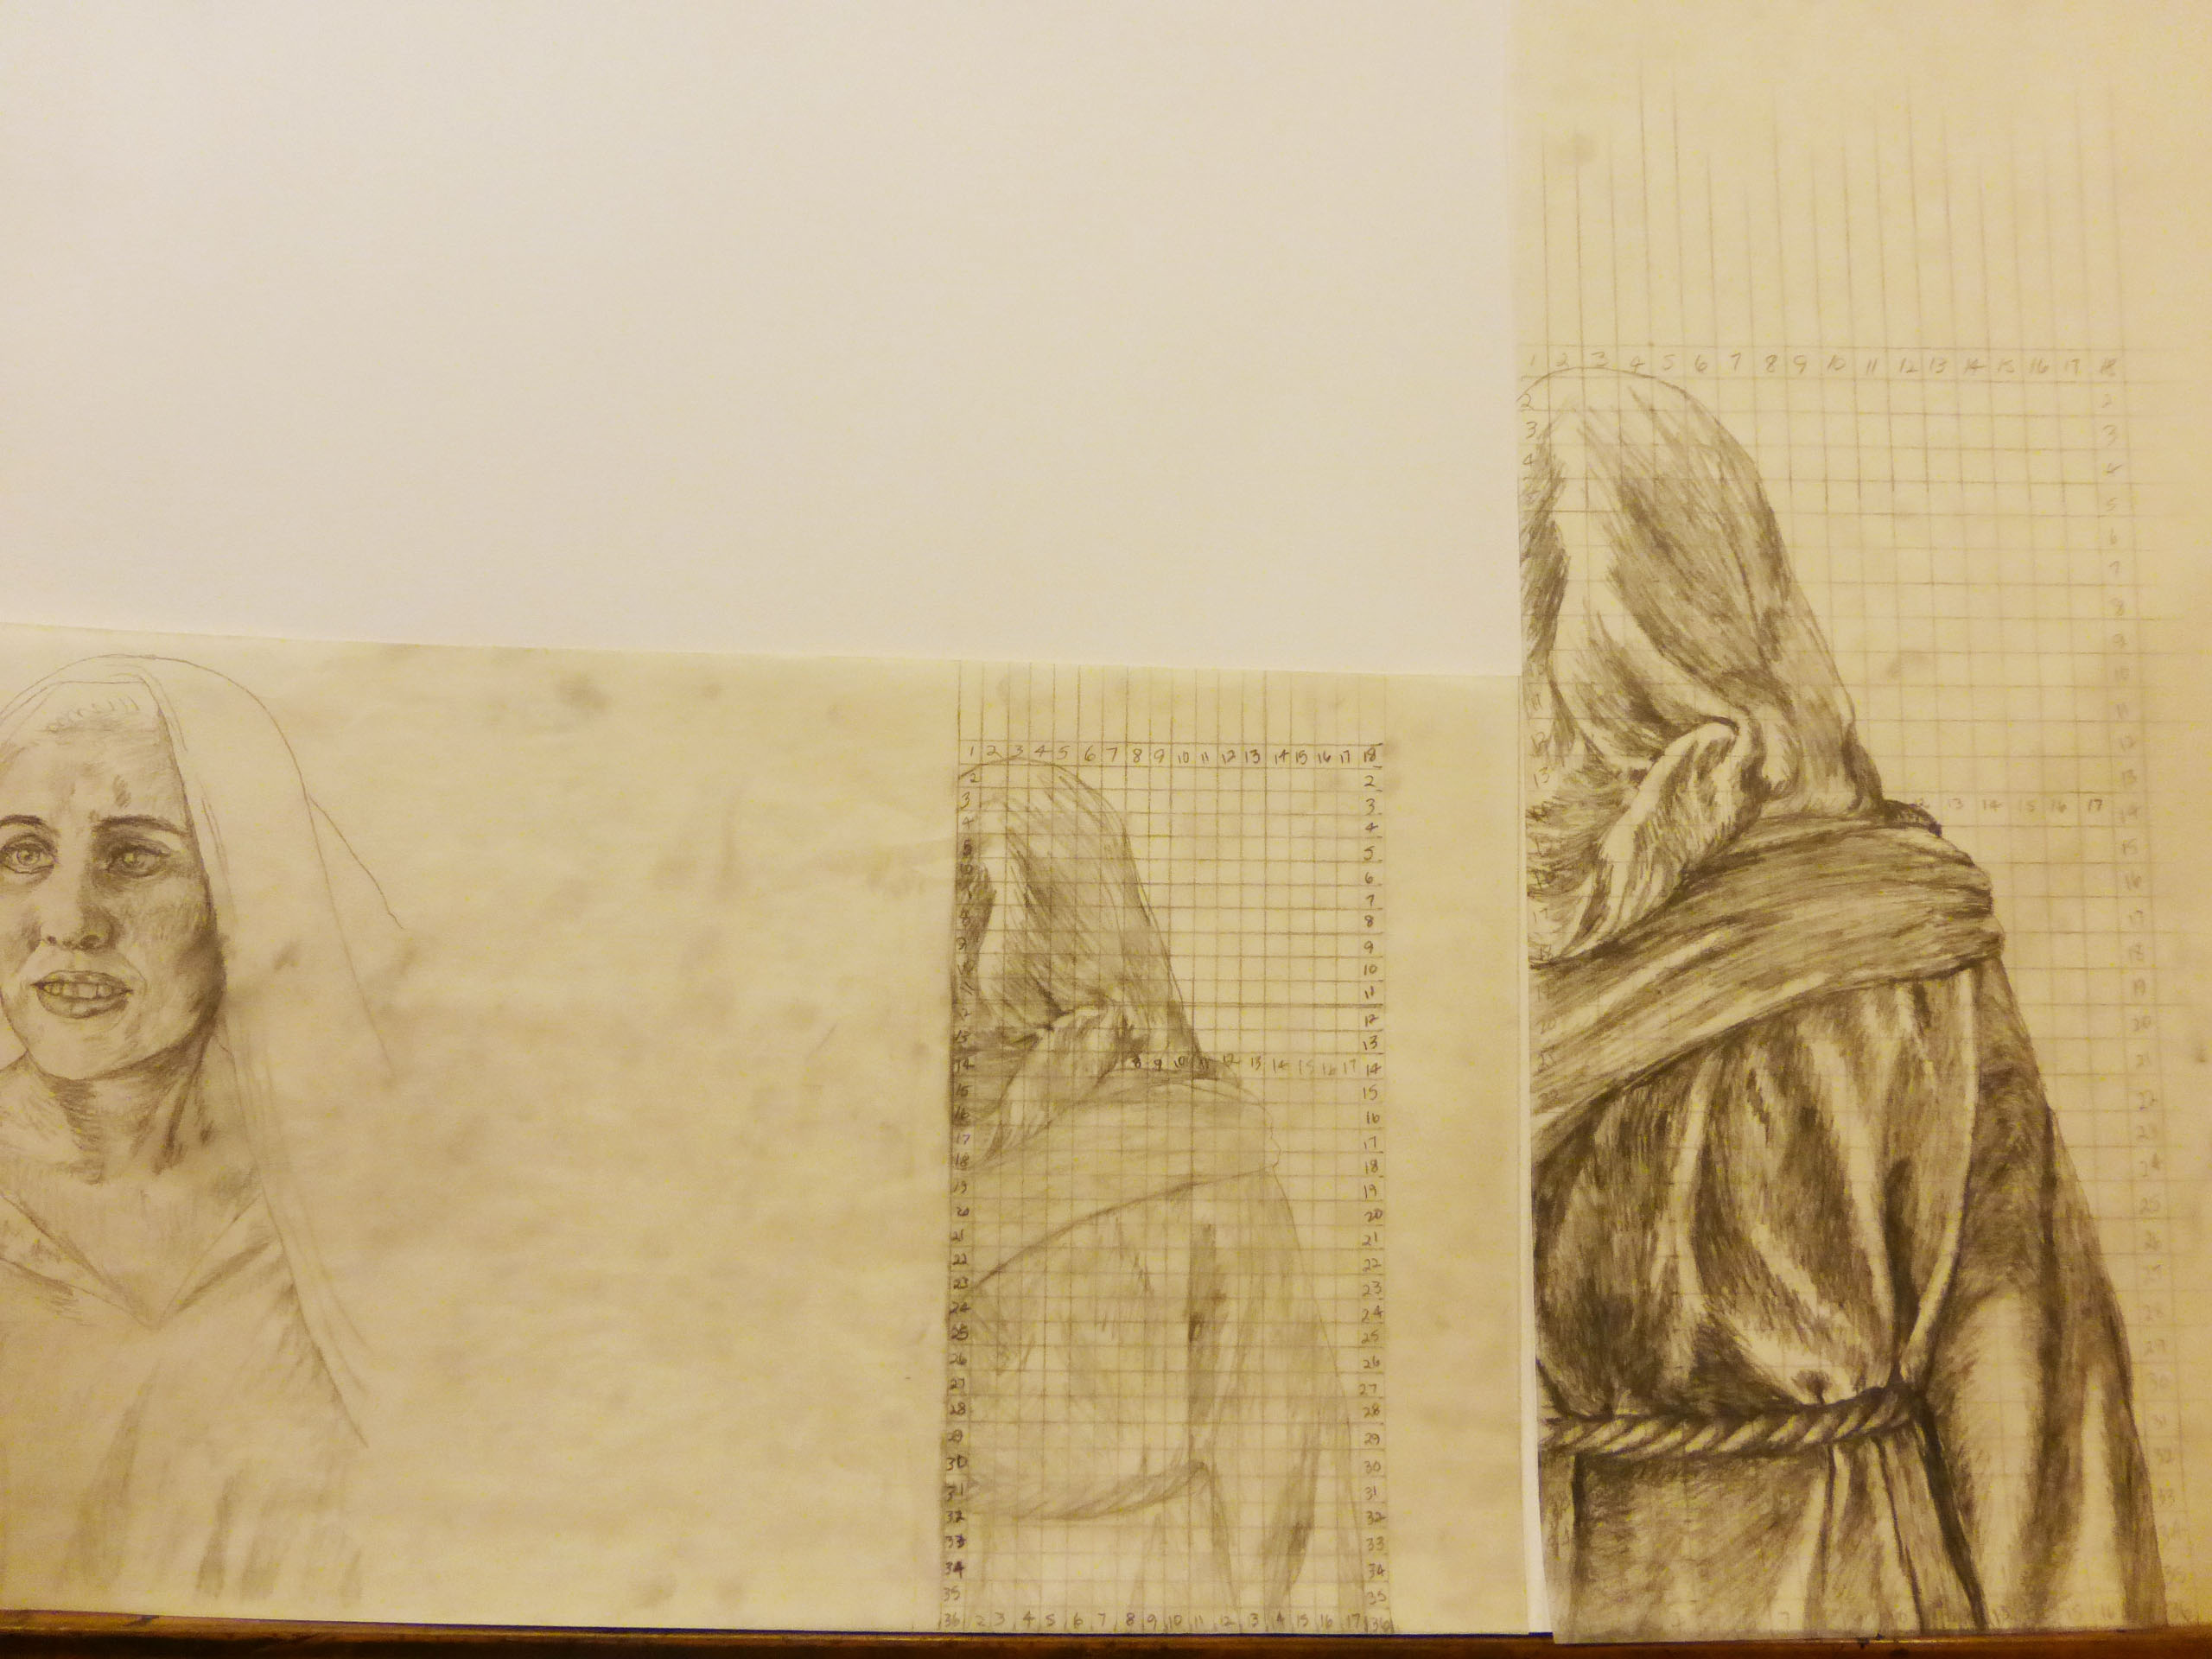
 it was outlined in blue chalk powder on the wet plaster, just waiting for Michelangelo to fill in the details with paint. Voila! Frescoes!
I do exactly the same thing except I’m not using wet plaster or blowing up the images so huge. I figure if it worked well enough for Michelangelo, it surely is good enough for me!
Recent Comments